Most first-time glampers make the same mistake: they book a site that photographs beautifully, then discover on arrival that the “cozy” tent has no heating, the bathroom is a five-minute walk away, and the nearest restaurant is an hour down a gravel road. The photos looked great online, but the reality didn’t match the comfort, location or amenities they actually needed for a good night’s sleep.
This guide walks you through how to choose a glamping site with confidence, step by step. We’ll compare tent styles from safari tents to treehouses, set a realistic budget, pick the right setting, check the amenities that matter, time your booking, and vet reviews and hosts before you pay a deposit. Follow along and your first glamping trip will feel like an upgrade, not a gamble.
What Glamping Style Suits Your First Trip
The style of structure you choose shapes almost everything about your trip: how warm you’ll be, how much space you’ll have, and how the weather will treat you. The five most common options each behave very differently once the sun goes down or the wind picks up.
How each style handles space and weather
Safari tents are the classic choice: large canvas structures, often on wooden platforms, with generous floor space and sometimes multiple rooms. Their weakness is insulation. Canvas breathes well in warm, dry weather but offers little barrier against cold nights or driving rain. Yurts share similar traits, with round, airy interiors that feel spacious but stay best suited to milder months.
Geodesic domes and A-frame cabins are the sturdier bets. Their rigid frames and solid or insulated panels handle wind and cold noticeably better than any canvas structure, which makes them the safer pick for exposed hilltops, mountain settings or trips outside high summer. Treehouses sit somewhere in between: they’re memorable and often compact, but they’re exposed to the elements and usually best in calm, warm conditions.
Matching the style to your group
Couples tend to be happiest in a compact dome, where the space feels intentional rather than cavernous. Families should look for two-room safari tents or small cabins, since a single open structure with everyone in one room gets old fast. Before booking, check the stated floor area and sleeping arrangement, and ask the host directly how the structure performs in wind and rain, because a well-built canvas tent can be fine while a poorly sited one is not.
Setting a Realistic Glamping Budget
Glamping prices vary enormously, so it helps to know the typical bands before you fall in love with a listing. Basic glamping tents generally run $80-150 per night, while luxury domes and lodges typically cost $250-600+ per night. Neither band is “wrong”; they simply buy different levels of insulation, private bathrooms, furnishings and views. Knowing your band early keeps you from wasting time on listings outside your range.
When to book for the best rates
Timing moves the price more than almost anything else. Shoulder-season dates in April or October often come in 20-40% lower than peak summer prices, and you get quieter sites as a bonus. If your schedule is flexible, shifting a weekend trip to midweek in the shoulder months is usually the single easiest way to cut the cost of an otherwise identical stay.
Don’t forget the extras
The nightly rate is rarely the whole story. Firewood bundles, breakfast plans, kayak or bike rentals, and activity fees can each add a meaningful amount over a two- or three-night stay. Some sites include firewood and coffee; others charge separately for both. Before comparing listings, add up what you’d actually spend at each one: nightly rate plus the extras you know you’ll use. Two sites with similar headline prices can end up tens of dollars apart per night once the add-ons are counted. Ask the host for a full cost breakdown before you book, and check whether cleaning fees or deposits apply.
Choosing the Right Location and Setting
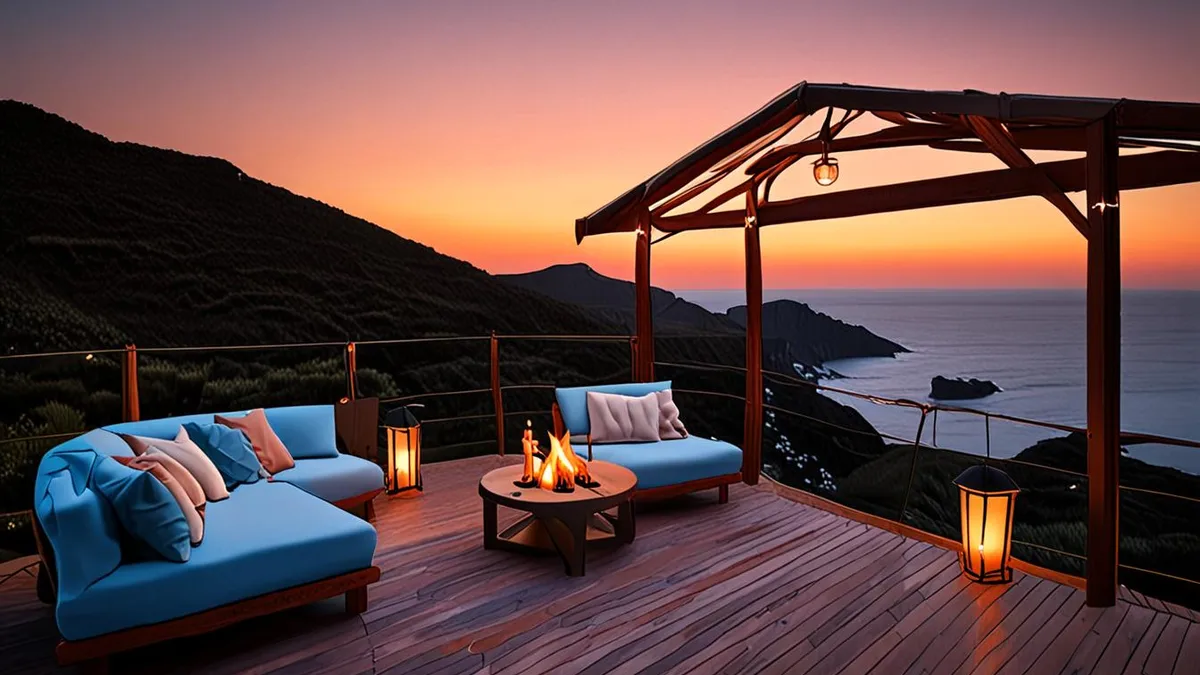
Where you stay matters as much as what you stay in. Start with the activities you actually want to do, then pick the setting that supports them. Coastal sites suit beach days, swimming and long sea-view walks, while forest settings deliver shade, trails and that classic campfire feel. Mountain locations reward hikers with cooler air and big views, and lakeside sites make swimming, paddling and sunset evenings effortless. If a sea breeze and a horizon sound like your kind of trip, a stay like this coastal pavilion with sweeping scenic views shows what the setting can add to the experience.
For a first trip, resist the urge to book somewhere gloriously remote. Most first-timers are happiest with a site within a 30-60 minute drive of restaurants or supply shops. That buffer means a forgotten toothbrush, a rainy-day dinner or a flat tire doesn’t turn into a crisis, and you can still feel properly away from it all once you’re back at your tent.
Road access is the detail nobody thinks to check until they’re on it. Ask the host directly about the final approach, and consider these points:
- Gravel or dirt tracks can be rough after rain; a car with low ground clearance may scrape, so ask how long the unpaved section is.
- Steep driveways are a problem for loaded cars, especially with heavy luggage, and can be slippery in wet conditions.
- Parking distance matters: some sites require a short walk from the car to the tent, which changes how you pack.
- Winter or wet-season access can differ from summer; confirm the road is maintained year-round if you’re traveling outside dry months.
Checking Amenities and Comfort Levels
The difference between a magical first glamping trip and a miserable one usually comes down to amenities, not views. A canvas tent under the stars looks stunning in photos, but if you have to grab a flashlight and trek across a muddy field just to reach the toilet block, you will remember the trek, not the stars. Before booking, confirm in writing that your unit has a private bathroom, running water and a real bed with a proper mattress.
Temperature control matters more than most first-timers expect. Canvas structures cool down fast at night and heat up quickly in direct sun, so ask the host exactly how the unit is heated or cooled. A small portable heater is not the same as a proper installed system, especially for nights below 10°C or stretches above 28°C. If the listing is vague, ask directly what equipment is provided and whether it runs all night.
Size and layout are easy to underestimate. For two adults, aim for a tent of at least 25-35 square meters so you are not tripping over luggage, and look for covered outdoor space where you can sit with coffee if it rains. Sites like the oceanfront estate with elevated comfort show how much covered outdoor living changes the experience when the weather shifts.
- Wi-Fi quality: ask whether it reaches your actual unit or only the main lodge, and get the host’s honest answer on speed rather than assuming full streaming is possible.
- Kitchenette setup: confirm whether there is a fridge, a two-burner stove and a sink, since some “kitchenette” listings mean only a kettle and a microwave.
- Cooking equipment: check that pots, pans, utensils, plates and a cutting board are included, and ask if there is a grill or fire pit you are allowed to cook on.
- Lighting and power: ask how the unit is lit after dark and whether you can charge phones and cameras, since some remote sites rely on limited solar power.
Timing Your Booking and Stay
When you go matters almost as much as where you go. The same tent can feel like a luxury retreat in June and a damp, cold disappointment in a rainy off-season week, so timing deserves as much thought as the site itself. Weather shapes everything about a glamping trip: how comfortable the nights are, whether you actually use that covered deck, and how much you enjoy the walk to the fire pit after dark. It also shapes price, since hosts adjust rates around demand.
- Choose your season first. The peak season in most temperate destinations runs roughly May to September, which gives you the most reliable weather and the fullest range of site facilities, from outdoor showers to organized activities. If you prefer quiet trails and empty communal areas over guaranteed sunshine, April and October are the smarter pick.
- Book early for peak weekends. Reserve peak-season weekend dates 2-3 months in advance as a baseline. The most popular sites can sell out 4-6 months ahead, so if a specific tent or dome has caught your eye, contact the host as soon as your dates are firm.
- Shift to midweek if your schedule allows. Arriving on a Tuesday or Wednesday typically means lower rates than weekend pricing, and shared facilities like fire pits, kitchens and bathrooms are far less crowded. You will often have the best spots to yourself, plus easier parking and more flexibility if you arrive later than planned.
- Build in a buffer night if you can. A three-night midweek stay gives you a proper feel for the site and one relaxed day even if your arrival or departure goes sideways. It also lets you settle in properly instead of packing up the moment you unpack.
One last practical note: confirm check-in and check-out times before you finalize travel plans, since remote sites sometimes have limited staffed hours and self-check-in instructions that arrive by message only. Ask what happens if you are delayed on the road. A midweek arrival with a clear check-in window sets up your whole trip, giving you daylight to unpack, meet your host and get oriented before dark.
Vetting Reviews and Host Communication
Photos are marketing; reviews are reality. A listing can look flawless while the tent leaks in heavy rain, the neighboring site runs a generator until midnight, or the “luxury bed” is a futon with a sagging middle. Read the most recent reviews first, because a site can change owners, hosts or maintenance standards quickly.
What to look for in reviews
Search reviews specifically for three things: weather performance, cleanliness and noise. Did guests mention how the tent held up during a storm? Did they comment on mold, damp smells, spiders or dusty floors? Was the site quiet at night, or could they hear the road, other guests or farm machinery? A single mention of a leaky roof is a warning; several mentions across different seasons are a pattern. Also note how the host responds to negative reviews, since that tells you how problems get handled during your stay.
Talk to the host before you pay
Send a short message before booking and ask three practical questions. First, what is the exact check-in process, including whether someone meets you or you collect a key from a lockbox? Second, how is the mobile signal on site, which matters if you need to navigate or stay reachable? Third, what exactly is provided, from linens and towels to firewood and cooking basics, so you know what to pack.
Finally, read the cancellation terms carefully. Check how far in advance you can cancel, whether the deposit is refundable, and what happens if the forecast turns genuinely bad. Some hosts offer flexible rebooking, others do not, and knowing this before you pay is far better than discovering it in a rainstorm.
Your First Glamping Trip, Sorted
Glamping goes wrong when a site looks stunning online but misses what you actually needed: enough space, real warmth at night, or a bathroom you don’t have to walk across a muddy field to reach. The fix is simple. Choose a style and setting that match your comfort needs and planned activities, whether that’s an insulated dome for chilly nights or a roomy family tent near the water.
Then let your budget follow the season, not the other way around. Expect anywhere from $80 to $600+ per night depending on tent type and when you travel. Book peak-season weekends 2-3 months ahead, and vet recent reviews and the host’s answers before you pay a deposit.
Get those three things right, and your first night under canvas will feel like a proper holiday rather than a gamble. If this guide helped, leave a comment or share it with someone planning their first glamping trip.